
Understanding Your LiftMaster Garage Door Opener
Explore the foundational elements of LiftMaster technology, its evolution, and how it enhances home automation and security.
Introduction to LiftMaster Technology
LiftMaster has been at the forefront of garage door opener technology for decades, evolving from a simple motorized device to a sophisticated smart home component. As one of the leading brands in the garage door industry, LiftMaster has consistently introduced innovations that enhance convenience, security, and reliability. The company’s commitment to technological advancement is evident in its transition from basic chain-drive openers to more advanced belt-drive and wall-mount models. This evolution reflects LiftMaster’s responsiveness to changing consumer needs and its dedication to providing cutting-edge solutions for homeowners seeking a new LiftMaster garage door opener.
Benefits and Features of the LiftMaster Garage Door Opener
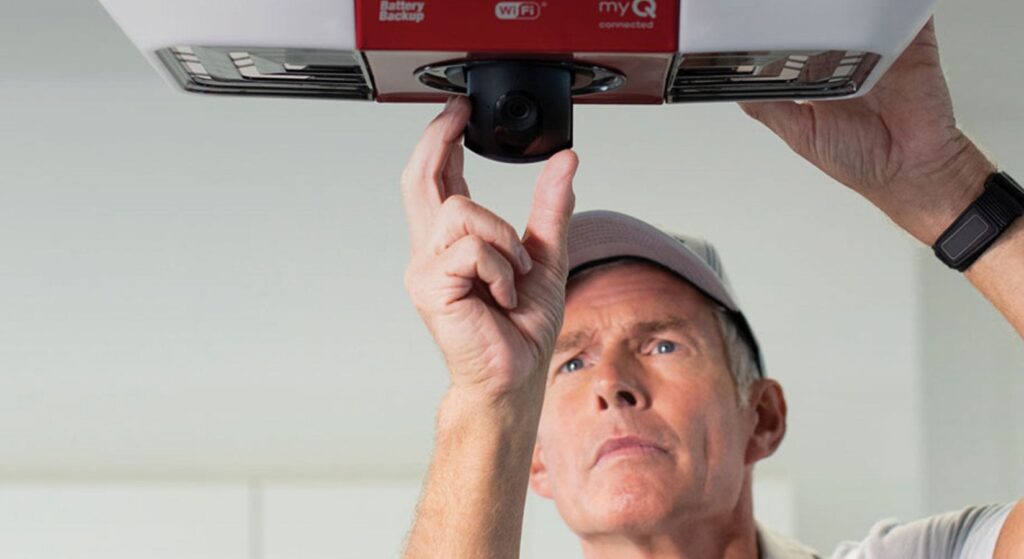
LiftMaster garage door openers are renowned for their robust feature set, designed to meet long-term expectations of homeowners. A standout innovation is MyQ technology, which allows users to monitor and control their garage doors remotely via a smartphone app. This smart capability transforms the opener into an integral part of a connected home system. Additionally, LiftMaster prioritizes security with features like Security+ 2.0, which uses rolling code technology to prevent unauthorized access. Other notable benefits include battery backup for uninterrupted operation during power outages, ultra-quiet belt drive systems for attached garages, and compatibility with various smart home platforms, solidifying LiftMaster’s position as a leader in overhead door openers.
Preparing to Program Your LiftMaster
Before starting the programming process, ensure you have the necessary tools and understand the safety measures required.
Tools and Equipment Needed
To program a LiftMaster garage door opener effectively, you’ll need a few essential items:
- Stepladder or sturdy stool
- Flashlight or headlamp
- Screwdriver set (flathead and Phillips)
- New batteries for the remote control
- Owner’s manual for your specific LiftMaster model
- Smartphone (for models with MyQ technology)
Having these tools on hand ensures you’re fully prepared to program your LiftMaster, whether you’re setting up a new system or reprogramming an existing one.
Safety Measures and Preliminary Steps Before Programming
Before you begin to program your LiftMaster garage door, prioritize safety with these steps:
- Disconnect power: Unplug the opener or switch off the circuit breaker.
- Clear the area: Remove obstacles from the door’s path.
- Check door balance: Manually lift the door to ensure it moves smoothly.
- Inspect safety sensors: Verify alignment and cleanliness of photo-eye sensors.
- Review manual: Familiarize yourself with your specific model’s instructions.
These precautions create a safe environment for programming, whether you’re setting up a new opener or updating an existing one.
Detailed Steps to Program Your LiftMaster Remote
Follow these detailed instructions to accurately program your LiftMaster remote for optimal performance.
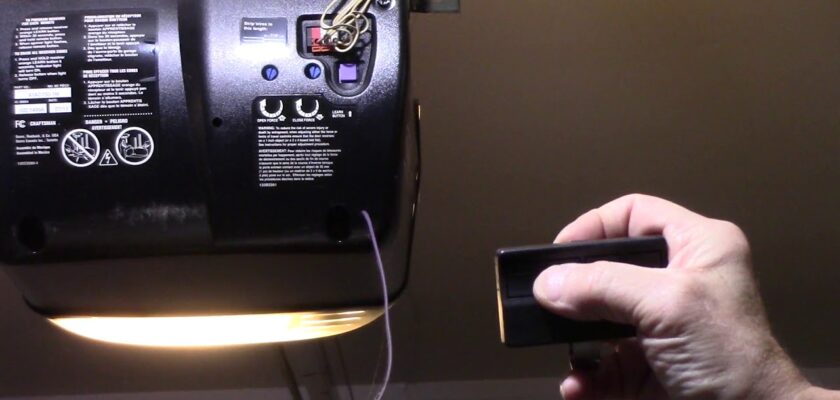
Locating the Learn Button on Your Opener
The Learn button is typically located on the back or side of your LiftMaster garage door opener motor unit. Here’s how to find it:
- Look for a small, colored button (usually purple, yellow, orange, red, or green)
- Check near the hanging antenna wire
- It may be hidden under a light cover, which can be gently opened
- On some models, it’s on the wall-mounted control panel
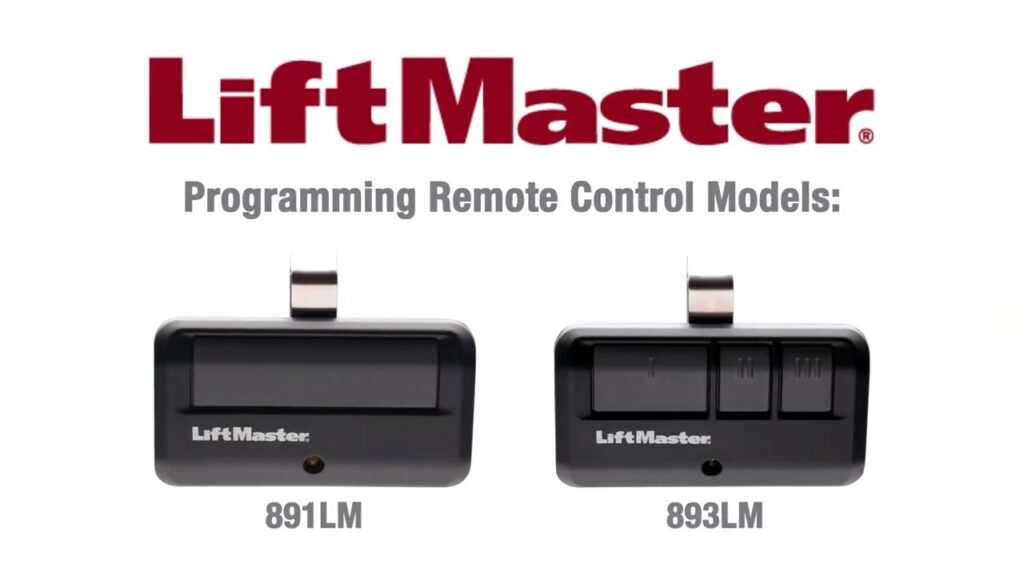
Step-by-Step Programming of the LiftMaster Remote Control
To program a LiftMaster garage door remote control, follow these steps:
- Locate the Learn button on your opener or wall control.
- Press and release the Learn button. The LED indicator will light up for about 30 seconds.
- Within 30 seconds of pressing the Learn button, press and hold the button on the remote control you wish to program for 3 seconds.
- Release the remote control button when the opener’s lights blink or you hear two clicks.
- Test the programmed button by pressing it to ensure it operates the garage door.
Note: For MyQ Control Panels, press and release the Learn button twice before proceeding to step 3.
Troubleshooting Common Issues During Programming
If you’re experiencing difficulties programming your remote, try these troubleshooting tips:
- Battery check: Ensure the remote has fresh batteries.
- Distance: Stand closer to the opener when programming.
- Interference: Temporarily unplug nearby electronic devices.
- Timing: If the remote doesn’t sync, repeat the process, ensuring you complete all steps within 30 seconds.
- Reset: Clear all codes and reprogram if the remote control button still doesn’t work.
If problems persist, consult your opener’s manual or contact LiftMaster support for model-specific guidance.
Programming Additional Devices

Learn how to synchronize additional remotes and keypads with your LiftMaster opener for comprehensive control over your garage system.
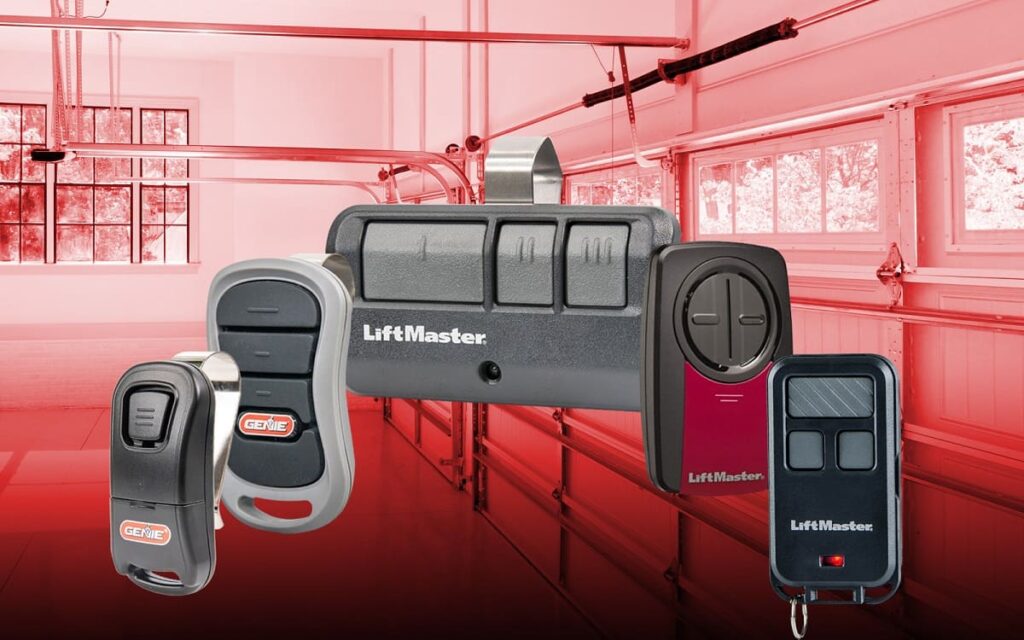
How to Program Additional LiftMaster Remotes and Keypads
To program your LiftMaster overhead door opener with additional remotes and keypads, follow these steps:
For Additional Remotes:
- Locate the Learn button on your opener.
- Press and release the Learn button.
- Within 30 seconds, press and hold the button on the new remote for 3 seconds.
- Release when the opener lights blink or you hear two clicks.
For Keypads:
- Enter programming mode by pressing ‘*’ and ‘#’ simultaneously until the keypad lights stop blinking.
- Choose a 4-digit PIN and enter it.
- Press the Learn button on the opener.
- Within 30 seconds, enter your PIN on the keypad and press ‘Enter’.
- The opener lights will blink to confirm successful programming.
Remember, the steps to program your LiftMaster may vary slightly depending on the specific model.
Ensuring Seamless Operation with Multiple Devices
To maintain efficient operation with multiple programmed devices:
- Placement: Keep remotes and keypads in easily accessible locations.
- Interference: Avoid storing remotes near large metal objects or electronic devices.
- Regular testing: Periodically test all programmed devices to ensure they’re working correctly.
- Battery management: Replace batteries in remotes and keypads simultaneously to maintain consistent performance.
- Documentation: Keep a record of all programmed devices and their assigned functions.
By following these tips, you can ensure that all your LiftMaster devices operate seamlessly, regardless of which programming mode or LiftMaster model you’re using.
Integrating Your LiftMaster with Your Vehicle
Enhance the convenience of your LiftMaster by integrating it with your vehicle’s built-in control systems like HomeLink.
Connecting Your Door Opener to Your Car
To link your LiftMaster door opener to your car’s built-in system:
- Locate the garage door opener buttons in your vehicle (usually on the console or visor).
- Press and hold the button you want to program for about 20 seconds.
- Go to your garage and locate the Learn button on your LiftMaster opener.
- Press and release the Learn button quickly.
- Return to your car within 30 seconds and press the built-in button twice.
- Test the connection by pressing the button in your vehicle to operate the garage door.
Note: Some newer vehicles may require you to turn the key to the “On” position before programming.
Setup for HomeLink Systems in Vehicles
For vehicles equipped with HomeLink, follow these steps to program the remote control:
- Clear existing codes: Press and hold the two outer HomeLink buttons until the indicator light flashes (about 20 seconds).
- Position the LiftMaster remote: Hold it 1-3 inches from the HomeLink buttons.
- Simultaneously press and hold the desired HomeLink button and the LiftMaster remote button.
- Wait for the HomeLink indicator to change from slow to rapid blinking.
- Release both buttons and quickly press the built-in button in your car three times.
- Test the setup by pressing the programmed HomeLink button to operate your garage door.
Remember, some LiftMaster models may require pressing the Learn button on the opener unit between steps 4 and 5 for successful synchronization.
Routine Maintenance and Care for Your LiftMaster Opener
Regular maintenance is key to ensuring the longevity and efficiency of your LiftMaster garage door opener.
Regular Maintenance Tips
To ensure the longevity and optimal performance of your LiftMaster openers, it’s recommended to perform these maintenance tasks regularly:
- Monthly visual inspection:
- Check for loose hardware
- Examine cables for fraying or wear
- Ensure the door is balanced
- Biannual lubrication:
- Apply silicone-based lubricant to the chain or belt
- Grease door rollers and hinges
- Annual safety checks:
- Test auto-reverse feature
- Clean and align photo-eye sensors
- Battery replacement:
- Change remote batteries annually
- Replace backup battery every 1-2 years
By following these simple maintenance steps, you can significantly extend the life of your LiftMaster opener and prevent potential issues.
When to Seek Professional Help
While routine maintenance can be done by homeowners, certain situations require professional expertise. Contact us today if you encounter:
- Mechanical failures:
- Door off its tracks
- Broken springs or cables
- Bent or damaged tracks
- Electrical issues:
- Opener fails to respond consistently
- Unusual noises during operation
- Partial opening or closing of the door
- Safety concerns:
- Auto-reverse feature malfunction
- Door falls rapidly when released
Don’t hesitate to reach out to us today for a professional assessment if you notice any of these issues. Prompt attention can prevent more serious problems and ensure your LiftMaster opener continues to operate safely and efficiently.
FAQs and Troubleshooting
Address common questions and issues that may arise during the programming or use of your LiftMaster opener.
Common LiftMaster Programming Problems and Solutions
Here are some frequently asked questions (FAQs) about troubleshooting LiftMaster programming issues:
- Q: My remote won’t program. What should I do? A: Ensure you’re within range of the opener and that the batteries are fresh. Repeat the programming steps, making sure to complete them within 30 seconds.
- Q: The opener lights don’t blink after programming. Is it still programmed? A: Not necessarily. Try the remote. If it doesn’t work, repeat the programming steps for your LiftMaster garage door opener.
- Q: Can I program multiple remotes to one opener? A: Yes, most LiftMaster models allow multiple remotes. Follow the same programming steps for each remote.
- Q: My keypad won’t sync with the opener. What’s wrong? A: Ensure you’re entering the correct PIN and pressing ‘Enter’ within 30 seconds of activating the Learn button on the opener.
How to Upgrade and Replace LiftMaster Models
When considering an upgrade or replacement of your LiftMaster garage door opener, keep these points in mind:
- Compatibility:
- Check if your new model is compatible with existing remotes and accessories.
- Ensure the new opener has sufficient power for your garage door’s weight and size.
- Installation tips:
- Always consult the owner’s manual for model-specific instructions.
- Consider professional installation for complex upgrades.
- Upgrading process:
- Remove the old opener unit, keeping the rail if compatible with the new model.
- Install the new opener, following the manufacturer’s guidelines.
- Program all remotes and accessories to the new unit.
- Replacing remotes:
- Ensure new remotes are compatible with your existing LiftMaster model.
- Clear old codes from the opener’s memory before programming new remotes.
- Repeat the programming steps for each new remote.
Remember, if you’re unsure about any step in the upgrade or replacement process, it’s best to consult with a professional to ensure proper installation and functionality.